The practical answer
Choose shutter speed for the water texture you want, then compare reflections separately. A polarizer changes reflected glare and also reduces light. A neutral-density filter mainly reduces incoming light so you can extend exposure. Neither substitutes for a composition that gives the water a clear role.
Decide how the water should feel
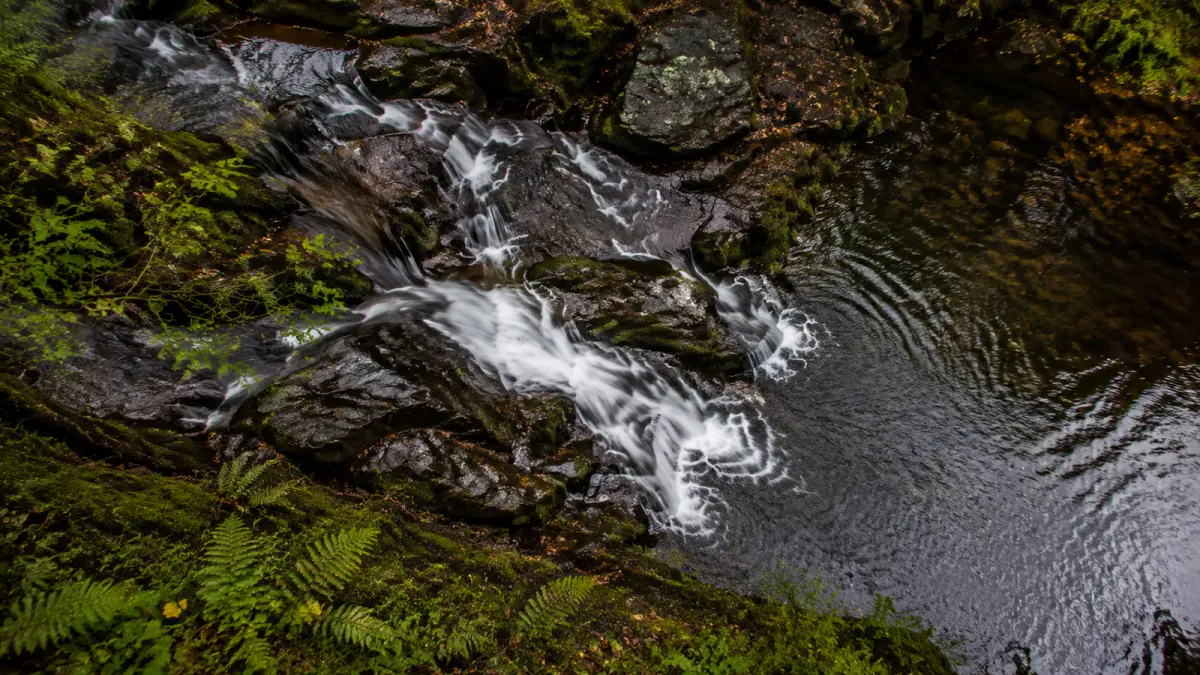
A waterfall photograph describes motion through a still frame. A short exposure can separate droplets and broken white water. A longer one can join those details into strands or a continuous flow. Reflections and foreground shapes then determine how that movement sits within the landscape.
KelbyOne’s introduction to The Grid’s waterfall episode brings those decisions together. Scott Kelby and Erik Kuna speak with photographer Kevin Adams about shutter speed, polarizing filters, weather, and composition. The starting point is the scene itself: what to emphasize before the file reaches the editing screen.
Use the following comparison exercise with a camera that offers exposure controls and a stable support for longer exposures. A polarizer is useful for the reflection stage, but the first comparison needs only a clear view of moving water beside something stationary. Choose a permitted viewpoint on dry, stable ground, with enough room to work without obstructing the route.
Compare texture before choosing a favorite
Begin with one small part of the waterfall. Include a rock, bank, or other fixed detail so you can distinguish water movement from camera shake. Set the framing and focus, then make a short exposure that retains visible structure in the flow.
Lengthen the exposure and repeat. The photographic role of shutter speed is to determine the recording interval. The same cascade can therefore appear broken, threaded, or smooth depending on how much movement accumulates during that interval. Nikon’s shutter-speed guide illustrates this relationship with moving water and other subjects.
Keep the images close in brightness by adjusting the other exposure controls. Watch the brightest water, where important texture can disappear into featureless white. Check the fixed detail for sharpness as well. If the rock is blurred, resolve camera movement before judging the water’s texture.
Make an intermediate exposure between the two versions. This third frame often helps reveal where separate streaks begin to merge. Compare the whole image as well as a close view. The right amount of blur is the one that gives the water the presence you want within this composition.
Flow rate and distance affect the result, so use the first series as a local reference. A setting that suits a narrow cascade may describe a broad, fast-moving fall differently.
Give reflections their own comparison
Once the water texture is working, look at the surface around it. Reflected sky can form a bright opening beside dark rocks. Reflected foliage can carry the surrounding color into the stream. Those reflections may be central to the photograph rather than something to remove.
If using a circular polarizer, rotate it slowly while watching the water, wet stone, and leaves. Make frames at two positions that produce a visible difference. Nikon’s polarizer examples show how reducing glare can reveal submerged detail and change the appearance of foliage.
Recheck exposure after fitting or rotating the filter. It reduces the light reaching the camera, and the chosen shutter speed still needs to produce the intended water texture. Keep the support and framing steady so the main comparison remains the reflected light.
Without a polarizer, a safe change in camera height or angle can provide another view of the surface. Stay on permitted ground and keep away from slippery edges. Observe whether the new position reveals the streambed, strengthens a reflection, or simplifies a distracting bright patch.
A neutral-density filter serves a different purpose. As Nikon’s filter guide explains, it reduces incoming light to allow longer exposures in bright conditions. Choose the filter for the decision you need to control: exposure duration or the character of reflected light.
Make the foreground part of the flow
Return to composition after the technical comparisons. A nearby rock can establish scale and lead the eye toward the cascade. A branch can echo the water’s curve. The foreground becomes useful when it creates a relationship with the movement beyond it.
Try a version with that nearby element and another with a simpler entrance into the image. Look for where attention lands first. If the rock dominates while the waterfall becomes a small afterthought, change the balance through position or framing.
Check the edges for bright fragments and interrupted shapes. A small highlight beside the border can compete with the main flow. Removing it from the composition may be more effective than darkening a large area later.
The same spatial attention underlies our street-photography exercise in light, depth, and anticipation. In either setting, the photograph gains clarity when each layer contributes to the path through the frame.
Edit the comparison consistently
Review the series with comparable white balance, contrast, and sharpening. Start at the intended viewing size, then inspect details for camera movement and clipped highlights. Keep the original captures so you can return to the decisions made at the scene.
Select one image for its water texture, one for its reflected light, and one for its composition. They may be the same frame, or they may reveal different strengths. Write down the choice that made each work.
If camera settings interrupted the exercise, our guide to choosing exposure modes can help make that part of the process more fluent. The aim on the next visit is to recognize the relationship sooner: a particular flow, a useful reflection, and a frame that gives both room to speak.
Worked example: keep brightness steady while water changes
Suppose a stationary composition is properly exposed at 1/30 second, f/8, ISO 100. A three-stop neutral-density filter permits approximately 1/4 second at the same aperture and ISO under unchanged light. That is a hypothetical exposure calculation, not a claim about the exact transmission of an untested filter. Compare the resulting water texture with the original and inspect a fixed rock for camera movement.
Next, compare two polarizer positions while returning the image to similar brightness. Judge the reflection independently from the blur. Removing glare may reveal the streambed but also remove a reflection that gave the picture depth. Nikon's filter guide distinguishes these filter purposes.
If the water's brightest texture clips, use a shorter or otherwise reduced exposure before relying on processing. The highlight-preservation guide explains what an editable file must retain.
When the aim is to clear people from a static scene, the crowd occupancy and median-stack guide explains why frame selection matters as much as a longer shutter time.